


I did not plan to bring home new birds that week. I went to the pet shop looking for material ideas for my next project, saw a mature female budgie sitting fluffed up among a bunch of very young birds, and then a male in another small shop just around the corner. I knew those two would not get much of a chance there.
That is how this build started. I wanted to give one pair a clean, calm place to settle, bond, and later possibly breed — a small indoor aviary with a handmade nest that looks like a real tree hollow.
Not a standard plywood box. A trunk.
Here is exactly how I built it, what I would do different, and how the two rescues accepted their new home.
Why a Tree Trunk Nest Instead of a Classic Box
In the wild budgerigars nest in hollows in eucalyptus trees. A square box works, it is cheap and easy to clean, but it looks nothing like what they would choose themselves.
I had a real natural log in mind at first. I even thought about using it for my next project. The problem is I do not have the tools to cut, hollow and shape a real log safely indoors. One wrong cut and you get cracks, sharp edges, mold spots you cannot see.
So I decided to build my own log. Same inside space as my other nest boxes — 20 cm width — but outside shaped like an old trunk with bark texture, knots and shadows.
It is more work. A lot more waiting. But you get full control over size, entrance, cleaning access and strength.
Materials I Used For the Artificial Log Nest
This is not a foam-only decoration. Female budgies chew around the entrance and inspect every corner before laying. Foam alone would be destroyed in days.
What held up for me:
- Styrodur insulation board for the core shape
- Wire mesh as reinforcement under the surface
- Tile adhesive for strength – several thin layers
- Joint compound for the second smoothing coat and bark texture
- Emulsion primer to seal the surface and stop dust collecting
- Dark brown water-based acrylic paint for base color, plus darker brown/black for shadows
- Sponge for dabbing paint, no brush marks
- Wooden perch at the entrance
- Wood shavings as mold/filler where a balloon would not work because of sharp wire ends
- Organic cat litter as bedding – I have used this for years both in the aviary and inside nests
- PVC profiles, screws, camera mount for later monitoring
Important rule I follow on every bird build: only water-based products, and let everything cure fully until there is no smell left. If it smells in your room, it is not ready for birds. Check the label that it is safe for animals once cured, and give it extra drying time.
How I Built the Artificial Tree Hollow, Step by Step
1. Core shape I cut Styrodur to get the hollow form, keeping the inside width at 20 cm like my proven boxes. That way I know the female has enough room to turn, lay and feed, and I can compare behavior with my other pairs.
2. Mesh skeleton Tile adhesive needs something to grab. I fixed wire mesh over the Styrodur to hold everything together. This is the layer that stops budgies from chewing through. They are small demolition experts and they will test it.
3. First coat of tile adhesive Thin coat, push it into the mesh, let it dry at least 24 hours. After the first coat it was already surprisingly solid.
4. Second coat + joint compound Second layer of tile adhesive, then joint compound to shape bark ridges and aged wood. At this point you can no longer tell what is underneath. It starts to look like a trunk, not a DIY sandwich.
5. Prime One full coat of emulsion primer. This seals the porous surface so it does not collect dust and so paint sits even.
6. Paint base and shadows Full cover in dark brown acrylic. Then while still workable, I dabbed darker patches into holes, cracks and around the entrance with a sponge and wiped back. The dark stays in the recesses. That creates depth. No hard brush lines.
7. Access and perch I left the nest accessible for cleaning and for checking chicks later. I also added a natural-looking perch at the entrance and a simple raised border at the bottom of the aviary to catch debris, seed husks and droppings.
Every layer needs a full day to dry. That was the most annoying part. Paint, wait 24 hours. Adhesive, wait 24 hours. You cannot rush it when birds will chew on it.
The Small Indoor Aviary Around It
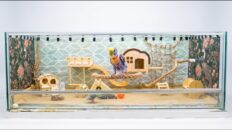
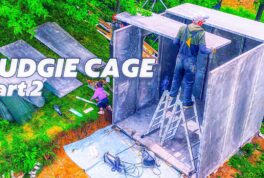
This time I built indoor and fully enclosed. No wire mesh sides like my garden aviaries.
Why:
- I do not like mesh look for an indoor breeding setup
- A solid enclosure with clear acrylic panels looks calmer in a room and stops cold drafts
Frame is simple wood, painted to look more natural and to protect the wood from moisture. Then I added legs to lift the whole aviary off the floor.
Budgies want height. You have seen it yourself — they always pick the highest perch in the room to rest, preen or sleep. Height means overview and safety. Close to the floor they feel exposed.
Details that made daily life easier:
Sliding acrylic panels for cleaning. Birds make acrylic dirty fast – droppings, dust, feathers. I used PVC L-profiles so the sheets slide in and out. Pull out, wipe, slide back. Without that, you will hate cleaning after two weeks.
Polycarbonate roof. I found a leftover sheet and used it for the roof. It was not in the original plan but it lets in much more daylight. Birds see poorly in dim light, much worse than we do. They need a bright day cycle, and a truly dark and quiet night. Do not put a lamp on all night near them.
Floor protection. Plastic sheet on the bottom for easy cleaning, plus extra protection under it so the wooden base does not soak up moisture over time.
Ventilation first. Enclosed means feather dust, dander and molt dust stay inside if you do not vent. I cut initial openings and left room to add more. If you copy this, you can also use mesh panels on the sides if your room is warm and dry. Adapt to your climate.
My room became the workshop because I have no other space. Not ideal, dust everywhere, but workable if you cover things and vacuum between coats.
What Cold Weather Showed Me at 10°C
We had almost a week of rain and cold while I was building. Daytime around 10°C. The birds were protected, and I could watch how the panels changed behavior.
Zebra finches: before panels, at the same temperature, almost all stayed inside their closed section. After panels, many more spent time outside. No cold draft cutting through, space felt warmer and cozier.
Button quails: before, they huddled together to keep warm. After, they were back to walking the ground and exploring like in spring and summer.
The chicken? She did not care about rain at all. Straight out in it while others hid.
Budgies in their indoor home were steady as always. Comfortable, active, normal routine.
Lesson I keep re-learning: keeping birds is not only food and water. The environment has to change with the season. Watch them. They tell you if they are cold, draft-stressed or comfortable by where they sit and how they move.
We still have months until spring. I check conditions and behavior regularly, not just once after a build.
Branches, Perches and Safe Wood
Natural branches take up far more space than straight dowel perches. Once I put them in, the aviary felt small. If you build this, go a bit larger than you think you need, or use branches that go more in depth rather than stretching horizontally across the whole box. That leaves flight room.
I collected branches in autumn during normal pruning. Autumn is practical – cutting healthy branches in active spring and summer growth stresses the tree more. I found what I needed next to an apple tree – an interesting shape with smaller side branches, already a good candidate for pruning and likely to be damaged by heavy winter snow anyway.
Rules I follow:
- Only use trees safe for birds, apple, willow, hazel, beech and similar known-safe species
- No sprayed trees, no roadside trees with pollution, no moldy wood
- Scrub, rinse and fully dry before mounting
- Cut to size outside the aviary, test fit before fixing
While collecting I ended up stepping on nuts all over the ground, so I gathered a few too. And as usual the chickens supervised everything. They are convinced every garden project includes snacks for them.
Bedding, Cameras and Nest Checks
Inside the aviary and inside the nest I use organic cat litter as bedding. It has been my main choice for years. It keeps the floor dry, clumps debris and I have had good results with it.
I also plan cameras to monitor inside the nest once there are eggs or chicks. You do not want to open a nest every hour. A small camera lets you check feeding, growth and problems without disturbing the female.
Make your nest openable from the start. You will need to clean, check for dead-in-shell eggs, or help if something goes wrong. A beautiful nest you cannot open is a problem waiting to happen.
Saving Two Pet Store Budgies: What I Looked For
First shop: mostly very young birds, but one older female stood out.
You can get a hint about maturity from the cere. A dark brown, crusty cere often means a hen has reached sexual maturity. It does not tell you exact age and it does not guarantee she is ready to breed. It is only one sign, combined with body condition, behavior and feather quality.
Second shop just around the corner: small cozy place, again mostly young birds. The owner pointed me to one male a bit older. Beautiful bird, calm in the hand. Good enough to try as a pair.
Transport was in a secure, well-ventilated transport box. Short, dark, calm ride. No playing with them, no photoshoot in the car.
Why did I not take birds from my big garden aviary? Those birds are used to a large flock and a lot of space. Putting them into a small breeding aviary would be stressful and unfair. These two pet store birds get a huge upgrade compared to a shop cage, and next year they can move to the big aviary once they are bonded and stronger.
If you bring home shop birds, remember you know almost nothing about them – size of original flock, breeding conditions, health of cagemates. Be careful before any contact with your existing flock.
First Days in the New Home, Bonding and Quarantine
I placed them in and let them be. Catching, transport and a new room is stressful even when the new home is far better. First hours they freeze, sit high, watch everything.
Two things helped:
- Acrylic panels were made clearly visible so they learn the boundaries and do not fly into them
- No pressure to bond or breed. They need at least 1 week just to settle, learn food and water spots, and get used to my routine and sounds
Parasites like mites can hide and spread fast. Ivermectin is one product used against certain mites in birds. I have seen it even in pet stores in Budapest, as I showed in a previous video. Access is better now, but that does not mean every new bird needs medication.
Do not dose on guess. Check the bird, watch droppings, breathing, sneezing, scratching, bald spots, scaly cere or feet. If in doubt, ask an avian vet first. Early treatment is easy. Treating a whole flock after spread is hard.
I keep new birds separate, wash hands between aviaries, and disinfect transport boxes right after use.
Is This Aviary For Permanent Living?
No. Be clear about this.
This build is a breeding and nesting aviary for one pair only, not a permanent home for a flock. It is small once branches, nest, food cups and the birds are all inside. For bonding, mating, laying and raising one clutch, it works because it is calm and controllable.
For long-term keeping, bigger is always better. Flight length matters more than height for daily exercise. If you want a permanent indoor home for 4-6 budgies, double this footprint at least and give a long flight path.
My plan: let them bond here, share updates on bonding, possible eggs and hatching, then move them to the large aviary next year where they have flock life and real flight distance.
Dimensions and How To Copy This Build
As promised in the video, I show all exact measurements and technical details at the end of the video so you can pause and copy them. Use them as a starting point.
When you adapt:
- Keep inside nest width around 20 cm if you liked my boxes
- Keep the nest openable and camera-ready
- Raise the aviary off the floor – budgies feel safer high
- Plan sliding panels or removable fronts for cleaning from day one
- Start with at least two ventilation openings, add more if you smell dust or see condensation
- If your room runs hot or humid, replace one acrylic side with mesh
- If your room runs cold or drafty, keep acrylic and watch behavior like I did with the finches
Measure your doorways before you build. An indoor aviary that does not fit through the door is a classic mistake.
Cleaning Routine That Keeps It Healthy
Enclosed looks clean until it is not. Feather dust builds invisibly.
My routine:
- Daily: change water, blow off seed husks, quick check of droppings
- Every 2-3 days: wipe acrylic lower edges, shake bedding top layer, check ventilation holes not blocked by dust
- Weekly: pull sliding panels, full wipe, clean perches and floor border, replace soiled bedding in nest area if not breeding
- Between clutches: full nest clean, replace all bedding, check adhesive edges for chew marks, re-seal if needed
Plastic under bedding plus a raised border saves the wood. Without that, moisture creeps in and you get smell and mold.
Frequently Asked Questions
Can budgies breed in an artificial log nest? Yes, if inside size, entrance size, darkness and access are right. My inside width matches my proven wooden boxes, 20 cm. Material outside matters less than safety, dryness and calm. Let the pair bond first, at least a week to settle, often longer.
Is tile adhesive safe for birds? Only when fully cured and sealed with primer and water-based acrylic, with no smell left. I used several thin layers over wire mesh so birds cannot chew through to foam. Always choose water-based products labeled safe for animals once cured, and give minimum 24 hours per layer, longer in damp weather.
Acrylic or mesh for an indoor aviary? Mesh wins on airflow. Acrylic wins on draft protection, viewing and looks. I chose acrylic with dedicated ventilation openings because my space needed draft protection and I wanted easy viewing. In warm rooms, use mesh sides. Watch the birds – huddling, staying inside, sneezing or dusty smell means adjust ventilation.
What branches are safe for budgies? Unsprayed apple, willow, hazel, beech and other known bird-safe woods. No chemically treated wood, no roadside wood, no mold. Scrub and dry fully. Autumn pruning is a good time to source.
How do I know a female budgie is mature? A dark brown crusty cere often points to sexual maturity, but it does not give exact age or breeding readiness. Look at overall condition, behavior and history if you have it. Give new birds time and quarantine before pairing.
Do new pet store budgies need ivermectin right away? Not automatically. New birds need observation and quarantine first because you do not know their background. Ivermectin is used against certain mites, but use only after checking symptoms and ideally after vet advice. Treating early when needed is easier than treating a full flock later.
What Comes Next
For these two, this is just the start. I will share updates on settling, bonding, and hopefully nesting and chicks.
If you build your own version, start with ventilation, cleaning access and bird-safe curing times. Looks come last. Comfort comes first.
More budgie guides, questions and aviary gear are on my site: alenaxp.com and
Ask a budgie question
If you love budgies, join Budgerigar Nation — over 1M of us sharing care tips, taming and training, breeding and genetics, aviary tours and budgie sounds every week: Subscribe to Alen AxP
Thanks to members for support, and thanks for watching. Check the video on screen while you wait for the next update.


Add comment